Life in Lape Haven

Tag - Grandma

Why We Love Baby Sign Language & 6 Tips for Teaching It to Your Little One

Why We Love Baby Sign Language & 6 Tips for Teaching It to Your Little One - Life in Lape Haven. Baby sign language is an easy, fun, and helpful way to teach your baby to communicate before they can even talk. All three of our children have learned signs and used them before they were one year old. Here's how you can teach your child signing, too.

When I was pregnant with Elijah, my paternal grandmother gave me two books about how to teach your baby to communicate using sign language. (One even came with flash cards.)

I’ll be honest. At first, I just looked at her. I’d never heard of such a thing.

But Grandma Charlotte was a pretty smart, well-read lady. She’d also taken classes in sign language a few years earlier so that she could communicate with a couple of family members who were hearing impaired, including my cousin’s little girl who is deaf. She knew how easily children could pick it up and how helpful it would be.Why We Love Baby Sign Language & 6 Tips for Teaching It to Your Little One - Life in Lape Haven. Baby sign language is an easy, fun, and helpful way to teach your baby to communicate before they can even talk. All three of our children have learned signs and used them before they were one year old. Here's how you can teach your child signing, too.

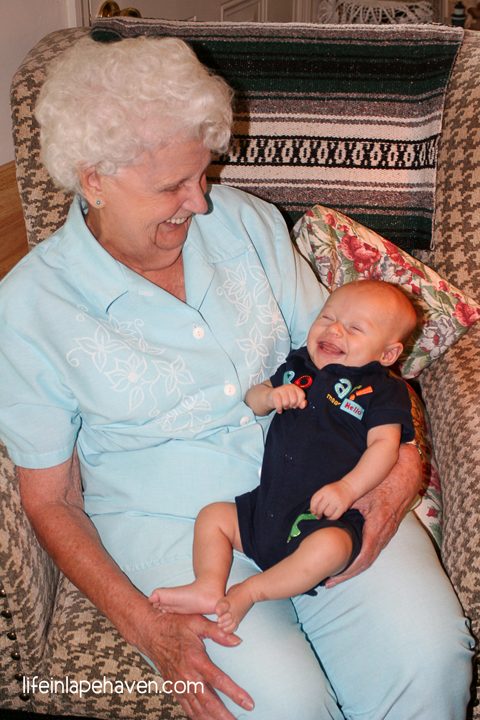
So, I read the books, learned some of the basic signs, and taught them to my husband and our parents.

When Elijah was a few months old, I started using the signs as we went through the day, whenever it applied to what we were doing. I’d say the word as I signed it, and soon it became a habit for me.

As Elijah got a little older, we could tell he understood what the signs meant, and, somewhere around 8-9 months, I think, he began signing back.

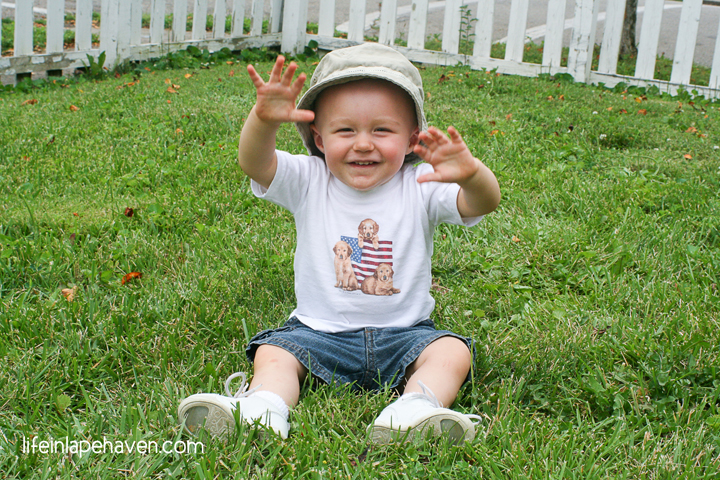
If you’ve never seen a baby use sign language, it’s kind of amazing – and super cute!

Suddenly, he could ask for a “drink” or let us know when he was “done” or wanted “more.”

We didn’t have to struggle as much with figuring out what he wanted or needed, and Elijah wasn’t whiny or frustrated…unless he was told that he couldn’t have something he wanted. 🙂 Learning “no” is never fun, whether it’s verbal or in sign.

As my family saw how easily Elijah used his signs and how helpful it was, they started using them with his younger cousins.

My grandma was especially proud of our success, and of course, she enjoyed signing to him and seeing him respond happily.

Why We Love Baby Sign Language & 6 Tips for Teaching It to Your Little One - Life in Lape Haven. Baby sign language is an easy, fun, and helpful way to teach your baby to communicate before they can even talk. All three of our children have learned signs and used them before they were one year old. Here's how you can teach your child signing, too.

When Josiah came along, there was no question that we would teach him those basic signs as well, this time with Elijah’s help. Sadly, my Grandma Charlotte passed away when Josiah was only 5 months old, so she never really got to see how he benefitted from the communication tool that was her idea.

Now four years later, here we are, teaching a third little boy to use his hands to talk to Mommy, Daddy, and the rest of his family.

Isaiah’s response to sign language was almost immediate because the first one he learned was “milk.” If I wasn’t completely ready to nurse him, but showed him the sign for it, he would get upset pretty quickly! And there were times when I’m pretty sure he signed “milk,” even though he seemed too young to be able to.

Now that he’s at the age where he can mimic our signs easily, it’s been so fun to watch his understanding blossom. He’s been very quick to let us know when he’s “all done” eating, and he loves to tell you when something is “hot,” like the heater or his toy stove with the light-up burner. Haha.

But he picked up a new sign even more quickly last week. After only a couple of demonstrations and connecting the sign with what it meant, he was ready to use “cookie” as often as possible. 🙂

When others see us using signs with our boys, I’ve had them ask me if signing discouraged my children from talking when they were little. Since they could get their message across pretty clearly with just some gestures, after all, why would they need to use words?

Our experience, though, has been that both of our older boys started talking fairly early and easily. While this may be in part because I talked to them ALL THE TIME and prompted them to use words once they were able to, I think that teaching them sign language actually encouraged them to try different kinds of communication because they knew we were paying attention to what they “said.”

Another benefit I’ve found it being able to tell my little ones something without having to say a word, which is especially nice in church when you’re trying to be quiet, or in a noisy place, where your kids might have trouble hearing you. (Being able to sign “no” to even an older child across the room is awesome, especially when you couple it with “the look.”)

If you’d like to begin teaching your child sign language, here are a few tips from our signing experience with our three boys.

Why We Love Baby Sign Language & 6 Tips for Teaching It to Your Little One - Life in Lape Haven. Baby sign language is an easy, fun, and helpful way to teach your baby to communicate before they can even talk. All three of our children have learned signs and used them before they were one year old. Here's how you can teach your child signing, too.

6 Tips For Teaching Baby Sign to Your Little One:
1. Start Early

Begin signing even before your baby can physically and developmentally copy them, maybe around 3-4 months old.  You’ll get into the habit, & they’ll be learning. (Even if your child is older, you can introduce signing at any age!)


2. Don’t Use Too Many

Pick a few basic signs that you’ll use most often and most effectively and start there. We did ones like Milk, Eat, More, Done, Bath, and Change. You can add others later (Mom, Dad, Please, Thank You, Potty, Dog, Cat, and tons more), just like you build your baby’s verbal vocabulary a little at a time. Here are 21 words you can sign easily.


3. Be Consistent

Use the same sign and word each time and teach your spouse and other family or caretakers to use them, too. (Using standard ASL signs is the best for consistency with others who sign.) We all learn better with repetition. (Our kids can even use their signs in the nursery at church. Several families have taught their children signs, so most of the regular nursery volunteers are pretty fluent in baby sign as well. How cool is that?)


4. Sign in Context

Use the sign when you’re doing the action. Signing “change” makes more sense when you’ve got your little one down and ready to change their diaper, rather than when you’re in the living room and think they might have a dirty diaper. 🙂


5. Don’t Expect Perfection

When your baby starts to sign back, it’s most likely not going to be perfectly executed. Keep in mind your little one is still developing those fine motor skills, so pay attention to anything that even closely resembles a specific sign and respond to it.


6. Keep Signing

Once your child starts talking, there’s no rule that says you have to stop using and teaching them signs. Not only is knowing another language fun and beneficial for challenging their minds (and ours), it will create an instant connection for them with anyone they know/meet who also signs, some who may use sign language as their main form of communication.


Need more help getting started? Here are some fun resources for learning and teaching Baby Sign Language.

(Some of these links are affiliate links, which means that I may receive a small commission if you use the links. You can see my full disclosure for details.)

VIDEOS

One of our favorite sign instructors is Rachel Coleman of Two Little Hands and Signing Time. (We even used her “Potty Time” app when we were potty training Josiah.) Here are just a few of the video available on YouTube.

Baby Signs:


The Potty Time Song:


Best of Two Little Hands TV, featuring signs for foods, clothing, ABCs, colors, and more:


BOOKS


HAVE YOU TAUGHT YOUR CHILD BABY SIGN LANGUAGE? WHAT OTHER TIPS WOULD YOU GIVE?

Get more ideas & encouragement from this real-life mom as I experience God’s faithfulness through the joy and chaos of motherhood.

Join my email list!  


YOU MAY ALSO LIKE:

5 Tips & Tricks I Learned with My 3rd Baby that I Wish I’d Known with My 1st

10 Items that Helped Us Adjust to Life with a New Baby

Having a Second Child: The Amazing Multiplication of Love

The Unique Game My Family Has Played for 5 Generations

Life in Lape Haven: The Unique Game My Family Has Played for 5 Generations. Carrom is a board game over 100 years old, and it's one we've been playing it in my family for nearly as long.

Around here, winter is our favorite time for board games, card games, and puzzles. While the boys are always up for Candy Land, Chutes and Ladders, or Go Fish, they get really excited when we ask them if they want to play Carrom.

(This post contains affiliate links, which means at no additional cost to you, I may receive a small commission if you use the links.)

In case you’ve never heard of Carrom, it is a tabletop game that is similar to pool. You play on a square Carrom board that has a pocket on each corner, and instead of using a cue stick to hit billiard balls, you use your fingers to flick a “striker” ring into other rings, attempting to send your rings in to one of four corner pockets. You can play one-on-one or as two teams of two.

For me, this game always means family, laughter, and occasionally, a sore finger. (Flicking wooden or plastic rings can really sting sometimes.)

I was introduced to Carrom when I was little, and for the most part, it’s a game that I’ve always played at my maternal grandparents’ house. My great-grandparents, John and Leora, taught it to my grandpa, who shared it with my grandmother, and later they played the game with their children. My grandparents have taught all of the grandchildren and great-grandchildren as we got old enough to learn. It’s a family tradition.

Whenever we visit them during the winter months, their board is usually already set out on a card table with four chairs around it, rings on the board, ready to go.

Life in Lape Haven: The Unique Game My Family Has Played for 5 Generations. Carrom is a board game over 100 years old, and it's one we've been playing it in my family for nearly as long.

Having played pretty much all his life, Grandpa is really, really good at Carrom, and Grandma’s not too bad herself. Sometimes I like to play just so I can watch them work their magic. Being truly great grandparents, they don’t show much mercy during a game, especially now that we’re older, although they take it a little easier on the great-grandchildren. 🙂

Of course, as we play, we have plenty of time to talk and share, which is really what makes the time special.

My mom and I have both found Carrom boards for just a few dollars at the thrift store and then ordered the rings online so we each have our own to practice on and teach my boys and their cousins. You can order entire game board sets online, too – Carrom Board Game

This year Josiah was old enough to begin learning how to play, and so on New Year’s Day we set up the board, and Elijah, Josiah, and their cousin Christian all had fun flicking the rings around the board. It was hilarious watching Josiah try to shoot because he had to make this “Popeye” face every time he shot. Meanwhile, Elijah has gotten better and better each year, and it’s impressive to watch him plan out his turn and actually be able to do it the way that he saw it.

Life in Lape Haven: The Unique Game My Family Has Played for 5 Generations. Carrom is a board game over 100 years old, and it's one we've been playing it in my family for nearly as long.

I think we played at least three times while Christian was here and another three or four once Brad got home.

The boys can’t wait to visit their great-grandparents soon so they can play with them. They are at least the fifth generation in my family to enjoy this game, and I’m so glad that we get to carry on this fun family tradition.

To learn more about Carrom, you can check out Wikipedia, Carrom.org, and Masters Games.

You may also like these other memories I’ve shared about my grandparents and my Great-Grandma Leora:

The Legacy in an Apple Pie Recipe

Great-Grandma’s Rainbow

Making Grandma’s Lime Pickles

Get more ideas & encouragement from this real-life mom as I experience God’s faithfulness through the joy and chaos of motherhood.

Join my email list!  

Making Grandma’s Lime Pickles

Making Grandma's Lime Pickles: Life in Lape Haven. While it might seem light just a recipe for making and canning lime pickles from cucumbers, learning my great-grandma's recipe for sweet and tangy lime pickles from my grandmother is a special inheritance that connects generations.

Growing up, family gatherings at my maternal grandparents’ farm were always packed-house events with plenty of love, laughter, food, and volleyball (it’s kind of our family sport).

Grandpa and Grandma raised five children in their three-bedroom, one-bath home, and with addition of spouses and grandchildren (which numbered 14 when I was a young teen), dinner time meant a main table in the kitchen and a kids’ table in the utility room (when there were just 6 to 8 of us grandkids) and/or in the living room. It also meant that you wanted to get in line for food before the older grandsons.

Thankfully Grandma made sure she always had plenty of her most coveted homemade offerings: mashed potatoes, green beans, yeast rolls, and a type of sweet and tangy pickle that my Great-Grandma Leora (Grandpa’s mother) used to make, called “lime pickles.”

Making Grandma's Lime Pickles: Life in Lape Haven. While it might seem light just a recipe for making and canning lime pickles from cucumbers, learning my great-grandma's recipe for sweet and tangy lime pickles from my grandmother is a special inheritance that connects generations.

I cannot remember a single “everybody’s here” family dinner where we didn’t have all four of those items on the menu. After church on Sunday, they were there. Every Christmastime, they were there. Easter, there. Birthdays, there. Always, there.

As I got older, I helped out in the kitchen prep for some of those meals, so I learned how to make mashed potatoes, green beans, and yeast rolls just like my grandma. I was only missing one part of that nostalgic culinary quartet. Even though I’ve opened countless jars of her pickles over the years, filling bowls and setting them on the table, it wasn’t until a few years ago that I finally had the chance to learn how to make my grandma’s (and great-grandma’s) lime pickles.

Having never canned anything ever, I admit that I was a little intimidated by the idea. But Grandma was, as she always is, remarkably encouraging and patient, “Honey, if I can do it, you can it.”

Since making lime pickles requires a 24-hour soaking of the sliced cucumbers in the lime solution, Grandma had done all the prep work the day before, bless her heart. She sliced the cucumbers from her garden and ones I’d sent down to her from ours, and she mixed up the lime solution and put the slices in the mix to soak.

As we started the process of transferring the soaked cucumbers slices to the sink for a good rinsing off, Grandma gave me a little history on this recipe. She learned how to make lime pickles from her mother-in-law, my Great-Grandma Leora. (I’d always figured it was something passed down to her from her own mother).

The first time she went to help Great-Grandma make the pickles, Grandma realized that Leora was using lime, as in calcium hydroxide. She asked her mother-in-law, “Are you sure?” All Grandma knew about lime was that it was something that they dumped a cup of down their “backhouse” (outhouse) every so often, to keep the outhouse from smelling. Great-Grandma assured her that lime was what they needed to use.

Leora got her lime at the feed supply store back in the day, but we used a package of “pickling lime” from the grocery store. The pickling lime helps to maintain the “crunchiness” of the cucumber, but since it is alkaline, it can neutralize the acidity in your pickles, leading to sickness, if you don’t rinse them thoroughly enough. We rinsed ours in four changes of water in the sink, until the water was clear.

Life in Lape Haven: Making Grandma's Lime Pickles

Once the cucumber slices were rinsed well, they got to sit in a clean bath of rinse water for a few hours, during which time Josiah (who was with me) and I got to share lunch with my grandparents and just visit.

Any meal at my grandparents includes “visiting,” that time after everyone’s finished eating, but no one gets up from the table because you’re sharing and talking and laughing together. It’s almost sacred time, and there have been so many visiting sessions that I wish I could have recorded so that I would have my grandpa’s stories and silly jokes and Grandma’s laughter and comments to share with my children for years to come.

Three hours later, the lunch dishes were cleared from the table, Josiah was off to explore with his great-grandpa, and Grandma and I were ready to get to pickling. She had the canning jars cleaned and waiting in the oven, and she set the temperature to 200° to sterilize them as we cooked the cucumbers on the stove. Also on the stove, she had the jar lids and rings in a pan with water (about ¾ of the way full). Once they came to a near boil, she turned the burner down to a low simmer. Grandma explained that lowering the temperature kept the lids’ seals from sticking together.

Following Great-Grandma Leora’s recipe, we mixed up the brine in a large stock pot and created a “bag” of all the spices. (Grandma used an old kitchen washcloth, cut off a strip to tie it up, and then cut off the excess. You could use cheesecloth or a clean linen cloth.) Once the brine was stirred well and the bag of spices tossed in to float around, we filled the pot with our rinsed cucumbers slices. We actually had so many cucumbers that we had to make extra brine and spices to have enough to come up close to the top of the pot.


Setting the heat to medium-high and stirring occasionally, it was just a matter of time (about 15 minutes) before the first few slices started to become clear or translucent, meaning they were ready to go into a jar. Using a slotted spoon and a funnel, I ladled the first few slices into a waiting, very warm jar fresh from the oven. Once I’d found enough “clear” pickles to fill about half of the jar, Grandma used a towel to hold and cover the top of the jar, giving it a good shake or three, before allowing me to continue to fill it. When the pickle reached almost to the top of the jar, and after another good shake to make sure we couldn’t fit any more in, Grandma used a ladle and tiny strainer to add brine to the jar, filling it up to just where the neck of the jar starts. She gave the mouth of the jar a good wiping off and then using tongs, I carefully place a lid on the top, followed by screwing on the ring. (Note from my first experience: Don’t leave the tongs too close to the small pan on simmer. Metal gets warm there.)

With the jar filled, lidded, and ringed, we set it aside on the counter to begin cooling. (I was quite proud of the first jar.) Then it was on to Jar Number Two. By the time the cucumbers had been cooking for about 30 minutes, all of them were clear and ready to be canned, so Grandma and I worked out a good system of me filling a jar halfway, and then while she shook it down, I worked to fill a second jar. We went back and forth between them until one was filled, brined, sealed, and set on the counter to cool. Then we pulled new jar from the oven.

Life in Lape Haven: Making Grandma's Lime Pickles

We took turns spooning the pickles out of the brine because the hot vinegar in it can be potent and stings the eyes. However, while we worked, we talked and enjoyed our time together. I would ask her questions about making the pickles, and she would try to answer, but she laughed and told me, “I’ve never taught anyone how to make them. But I’ve made them enough that I should be able to tell someone how to do it!”

At the end of the day, we had 12 jars (10 of pickles and 2 of pickle brine), which we split between us since, as my grandma explained, she’d used mostly my cucumbers while she had supplied the items for the brine. (I would have been happy with just learning…and maybe one jar of pickles)

Grandma said they were ready to enjoy as soon as they’d cooled, or the next day, or a couple of years later (as long as they aren’t soft and don’t smell or taste funny). She also instructed me to remove the rings from the jars in the next day or two. Apparently my grandpa had once left some rings on and found out how hard it can be to remove them after they’ve been screwed on so tightly for a few years. He said, “You might need a crowbar.”

As we sat at the kitchen table, listening for the jar lids to “pop,” signaling that the jars had cooled enough and sealed properly, she shared some additional family recipes with me, including recipes from my great-great grandmas, both of my maternal great-grandmas, and even one from a great-great aunt. I definitely plan to try them out and share them with you some time. These recipes, like the one for my Great-Grandma Leora’s Lime Pickles, are part of my inheritance, and they are something I will share with my children throughout the years. Maybe someday I’ll get to teach them to my own grandchildren.

Life in Lape Haven: Making Grandma's Lime Pickles

It might sound silly to some, but I felt so privileged to be able to learn from my grandma how to make her pickles. It’s something that I’ve always wanted to do, and I know I have cousins who would have loved to have shared the experience, too.

Grandpa told me later that my grandma had been “really looking forward to doing this with you.” It almost made me cry. It made my day to know that it was important and special to her, too.

Setting aside this time to allow my grandma to pass on her knowledge, recipes, and stories brought us both tremendous joy and beautiful new memories to cherish together…and five jars of lime pickles each.

Get more ideas & encouragement from this real-life mom as I experience God’s faithfulness through the joy and chaos of motherhood.
Join my email list!  


Homemade sweet and tangy lime pickles from my great-grandma's recipe


YOU MAY ALSO LIKE:

Homemade Vanilla Ice Cream

Sweet Vinegar Slaw

The Unique Game My Family Has Played for 5 Generations

6 Fun Ways to Entertain Your Kids with Nothing But Their Imaginations