Life in Lape Haven

Tag - Tried It Tuesday

Daniel Fast Recipes: Two That We Loved & One I Won’t Make Again

Life in Lape Haven: Tried It Tuesday - Daniel Fast Recipes, Two Recipes We Love & One I Won't Make Again. Since hubby and I are participating in a 21-day Daniel fast with our church, I'm finding lots of new recipes to try as we follow the guidelines of this partial fast, which includes only vegetables, fruits, whole grains, beans, nuts, seeds, and water. These two recipes are our favorites so far.

For the majority of this month, Brad and I will be participating in a 21-day Daniel fast with our church. This partial fast is inspired by two different passages in Daniel, including the story in Daniel 1 where Daniel and his friends refuse the king’s food and request a diet of water and vegetables.

And that’s predominantly what the fast allows: water, vegetables, fruits, whole grains, beans, nuts, and seeds. We eat fairly healthy as it is, but creating meals without meat, dairy, bread, and sugar has been interesting. Thankfully it hasn’t been as difficult as I anticipated. (Note: There are many different takes on a Daniel fast, so my hubby and I decided that we would follow the guidelines that our church set out. Some interpretations are stricter; some are more lenient.)

Over the last week, I’ve been finding all kinds of new recipes to try out, and while some were just okay, others have been very successful.

The first big win so far was this One Pan Mexican Quinoa recipe that was super easy to make and really tasty. All it takes is a handful of ingredients: black beans, corn, diced tomatoes, vegetable stock, spices, lime juice, avocado, and quinoa. I don’t always keep quinoa on hand, but I had picked up some at Aldi (who else LOVES Aldi?) so we could try it out. Now that I know what to do with it, it may become a staple around here. In fact, this recipe is going on my meal-planning list because we all liked it so well.


Another yummy meal came about more out of necessity than planning. When we first shopped for this fast, we had two sick little boys, so hubby made the grocery store run. Awesome husband that he is, Brad did his best to cross off every item on the list I’d given him, and then some. When I saw that he’d brought home six different containers of mushrooms, I was a bit surprised, and I knew we’d have to use those up quickly. Thankfully, I found this recipe for Garlic and Balsamic Roasted Mushrooms. I actually didn’t expect them to be as delicious as they were. I had to keep from eating the whole pan before Brad made it home for dinner.

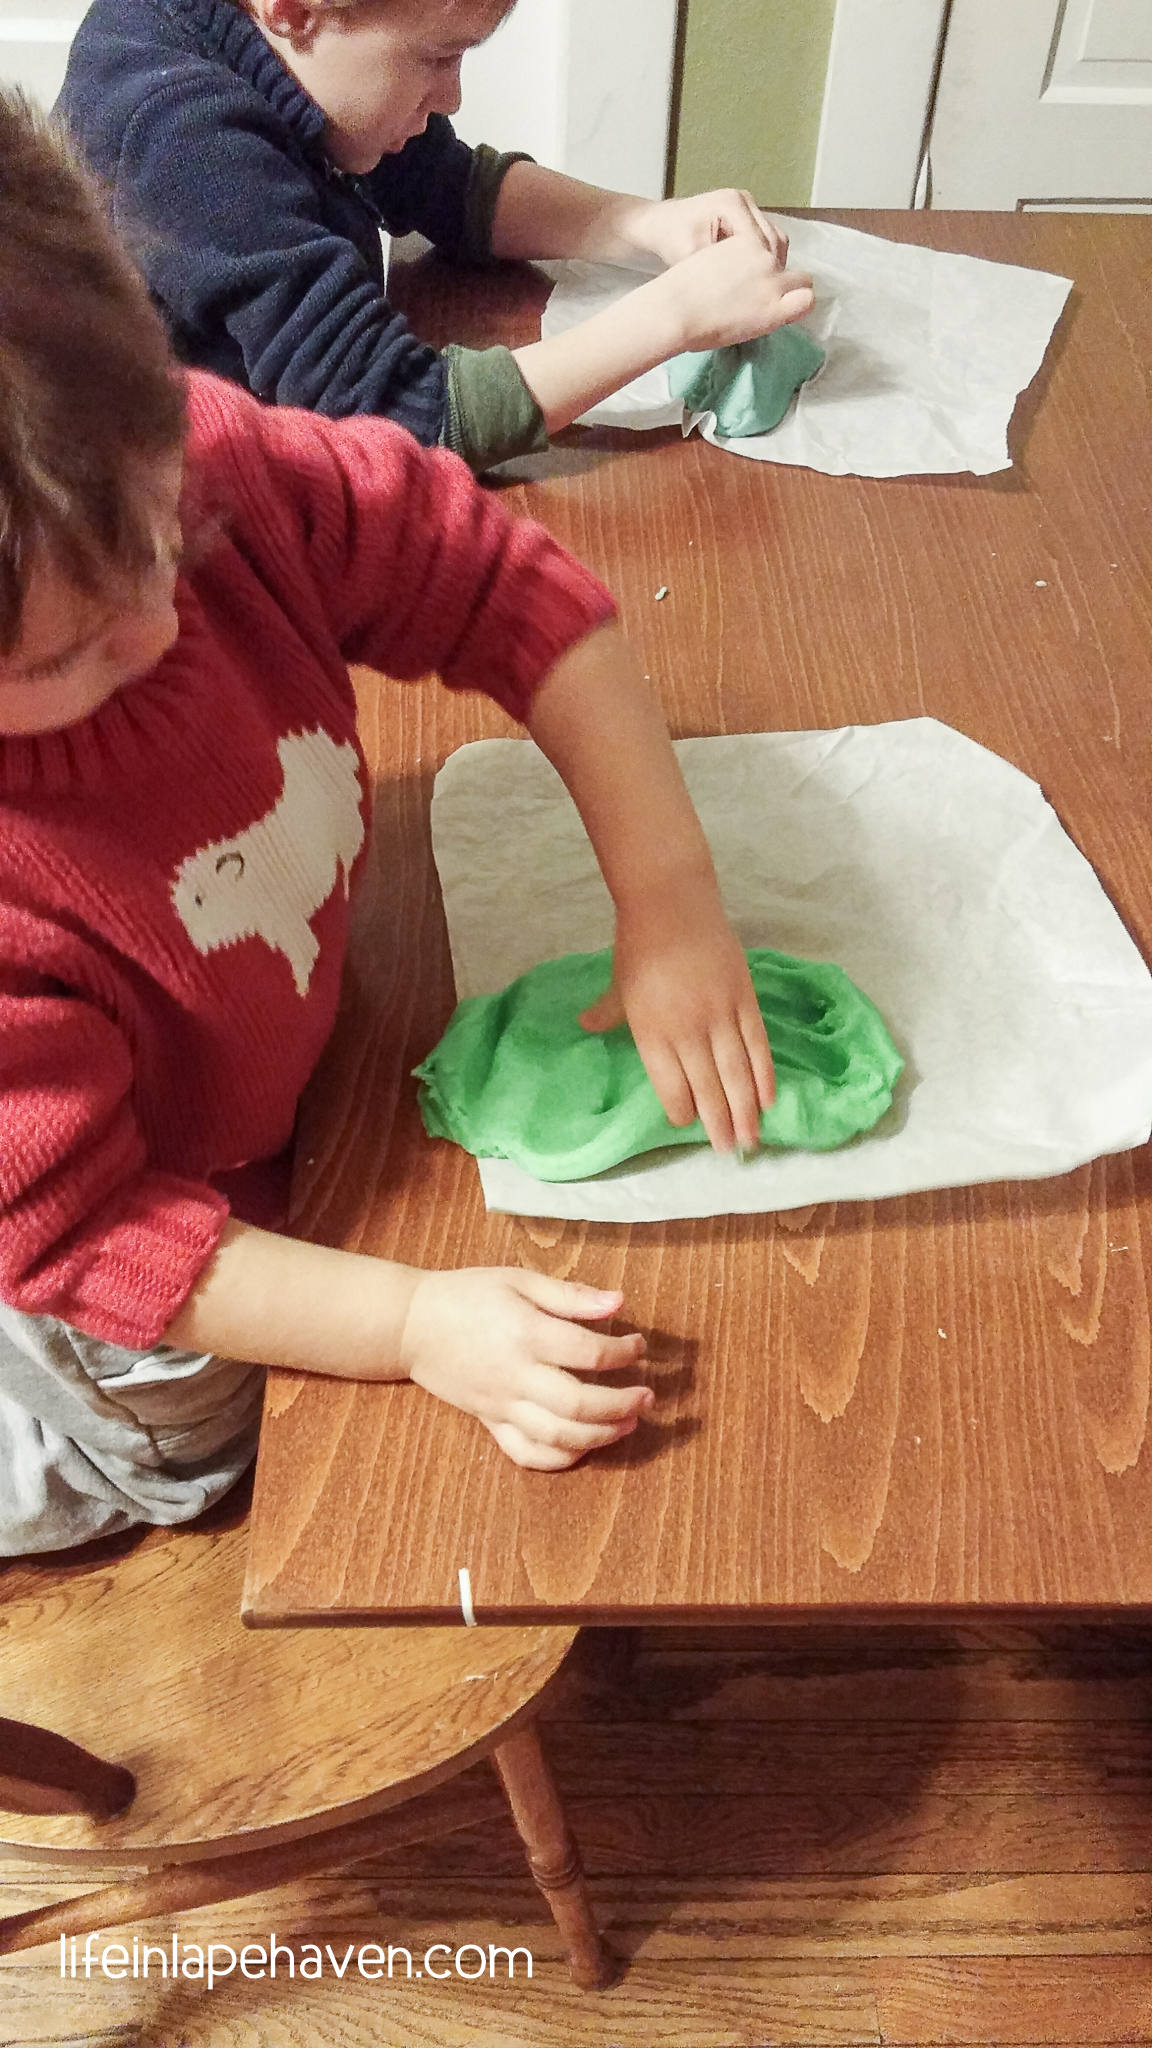
One recipe that I tried that didn’t work at all for us was a homemade applesauce fruit roll-up. Having seen the easy how-to video on Facebook, I thought my boys would enjoy a fun little treat one day. It seemed simple enough – pour some unsweetened applesauce onto a silicone baking mat, smooth it out, then let it dry slowly in the oven all day. After waiting several hours for the applesauce to dry out, I was ready to surprise my kids with a homemade roll-up. Unfortunately, I must have done something wrong because it stuck to my silicone baking mat, and parts of it were really difficult to get off. I figured I would just try again some other time, but then when I gave the boys the pieces that I managed to get off the mat, they wouldn’t eat them. They just didn’t like it. So, that recipe was kind of a flop for us. 🙁 (By the way, our boys aren’t on the fast, but this recipe would have worked for all of us had they liked it.)

So that’s what I’ve discovered so far during our first week or so of the Daniel fast, at least about the food part. Thankfully, these 21 days aren’t just about a special diet or a list of what we can eat or can’t. It’s a time to focus on drawing closer to God, seeking His face, and spending time in His Word. No matter what recipes we enjoy or fail with during this time, we can depend upon Him to always satisfy our soul.

“You satisfy me more than the richest feast. I will praise you with songs of joy.”  ~ Psalm 63:5


Tried It Tuesday: Bacon Chocolate Chip Cookies

Life in Lape Haven: Tried It Tuesday: Bacon Chocolate Chip Cookies . A tasty but easy tweak to traditional chocolate chip cookies, this recipe is delicious. Bacon and Chocolate Chip Cookies - genius! Homemade cookies with a hint of gourmet.

One day, about week or so ago, when my hubby came home from work, he said, “Guess what I had at work today?”

Since his office tends to order food in for the employees quite often, it could have been pretty much anything, so of course, I didn’t know.

“Bacon chocolate chip cookies.”

As his words registered, I thought, “That’s genius.” And then and there I told him that I’d be making some…soon.

Because I was sure I could find a recipe for them on Pinterest.

I was right, and I had plenty of options to choose from.

When I realized we had company coming down for the weekend, I knew I had to make these cookies for us all to try out.

Now, I know some people think that bacon in everything is kind of cliché and so overdone, but you know what? There is a reason, people:

Bacon is GOOOOOD! 🙂

Therefore, I set out on Friday to make my first ever batch of bacon chocolate chip cookies. I have to admit that I was pretty excited.

The first step is to cook your bacon, obviously. And while you can do that in any way you like, I prefer to cook my bacon in the oven, per Alton Brown’s method:

“Place the strips of bacon onto a sheet pan fitted with a rack and place into a cold oven. Turn the oven to 400 degrees F and cook for about 12 to 15 minutes, depending on how crispy you like your bacon. Remove from rack and drain on paper towels.”

This is an easy way to get crispy bacon without much effort. 🙂

I let the bacon cool a little, then transferred it to some paper towels to drain. I also poured the bacon fat from the bottom of the baking sheet into a measuring cup. I used a 12-ounce pack of bacon and ended up with about ½ cup of fat.  You need ¼ cup for this recipe.

To make the cookies, I adapted this recipe for bacon chocolate chip cookies. You are basically making a traditional chocolate chip cookie, but you substitute ¼ cup of the butter with the bacon fat and eliminate the usual teaspoon of salt. When you fold in the chocolate chips, you can add in bits of crumbled bacon, too. That’s pretty much it!

Since this was my first time making them, I kind of underestimated how much the cookies would spread out on the baking sheet, so as they baked, the cookies spread into one big connected cookie, plus I think I made them too big. I also let them cook a bit too long so they were a little crunchier than I would have liked.

Thankfully, I didn’t have to worry too much about the presentation of the cookies since I was serving them to my family and very close friends. I did, however, whip out my biscuit cutter to cut out a few round cookies. I did a few with my star-shaped cookie cutter, too, just for the boys. The extra, odd-shaped edges were more like cookie sticks, which made them great for dunking in milk. 🙂

Oh, and despite not being the prettiest cookies I’ve ever made, they were still pretty tasty. Like, really, really yummy. While they are still similar to a regular chocolate chip cookie, they are different enough that they aren’t the same at all.

In fact, I was right. Bacon chocolate chip cookies ARE genius.

Life in Lape Haven: Tried It Tuesday: Bacon Chocolate Chip Cookies . A tasty but easy tweak to traditional chocolate chip cookies, this recipe is delicious. Bacon and Chocolate Chip Cookies - genius! Homemade cookies with a hint of gourmet.

I know that you are eager to try these for yourself, so here is how I made them:

A Ridiculously Simple Way to Get Silly Putty Out of Fabric

Life in Lape Haven: A Ridiculously Simple Way to Get Silly Putty Out of Fabric. When I ended up with a pocketful of putty from my 2-year-old, I found a very easy solution for getting silly putty out of the fabric.

Remember that day not too long ago where my day was so epically bad that I had to post about it? Yeah, the day with not one, but two potty-training accidents in an hour, spilled milk and flour, scorched dinner, and general chaos?

Remember how I ended that night with such a sweet surprise of silly putty in my back jean pocket?

Well, good news!

I got all that silly putty out, even the deeply smashed in parts, and it was ridiculously simple.

Life in Lape Haven: A Ridiculously Simple Way to Get Silly Putty Out of Fabric. When I ended up with a pocketful of putty from my 2-year-old, I found a very easy solution for getting silly putty out of the fabric.

First off, as soon as I discovered the silly putty, I pulled out as much as I could. But of course, since I’d sat on it for a while before I found it, it was stuck pretty well.

There was a good bit of silly putty left smooshed into the fabric, and I had no idea how to get it off. I actually waited a day or two before even trying to tackle the mess because I was a little worried that it would require a lot of effort.

Life in Lape Haven: A Ridiculously Simple Way to Get Silly Putty Out of Fabric. When I ended up with a pocketful of putty from my 2-year-old, I found a very easy solution for getting silly putty out of the fabric.

After I pulled out as much silly putty as I could by hand.

However, I also had a few pairs of Elijah’s jeans marked up with dry erase marker, so I decided to experiment on both problems at the same time.

I investigated silly putty remedies on Pinterest and Google, and I found that many solutions called for ice cubes or freezing the silly putty and/or rubbing alcohol and WD40.

*SPOILER ALERT* – None of those are the easy solution that I found!

I did try stuffing the pocket with ice cubes, and I managed to pick a few tiny pieces off after the ice froze the putty, but glancing around at my table, I spotted something else that I decided to try.

Hand sanitizer.

With its alcohol-base but thicker consistency, I had just seen it help somewhat to get dry erase markers out of Elijah’s jeans, and since so many silly putty solutions suggestion rubbing alcohol, the hand sanitizer was worth a try.

I turned the pocket inside out, with the putty-iest parts showing and squirted some sanitizer on it.

Life in Lape Haven: A Ridiculously Simple Way to Get Silly Putty Out of Fabric. When I ended up with a pocketful of putty from my 2-year-old, I found a very easy solution for getting silly putty out of the fabric.

Hand sanitizer on the pocket.

All I did was massage the gel into the putty and use my nails to scrub it in a bit. A few seconds of working it in, and the putty dissolved, leaving the jeans clean.

That was it. A few more squirts of the sanitizer and rubbing it in, and the pocket was done. All the silly putty was gone without a whole lot of effort.

After that, I just washed the jeans as I normally would.*

It was amazingly simple.

*Note: Since hand sanitizer is alcohol-based, it might stain some fabrics, such as silk. As with all cleaners, test an inconspicuous spot of the fabric first.


With boys, I’ve learned how to handle all kinds of stains:

How to Get Dry Erase Marker Out of Clothing

How to Get Grease Stains (even set-in ones) Out of Clothing

How to Get Grass Stains Out of Clothes


Get more ideas & encouragement from this real-life mom as I experience God’s faithfulness through the joy and chaos of motherhood.

Join my email list!  

How to get Dry Erase Marker out of Clothing

Life in Lape Haven: Tried It Tuesday - How to get Dry Erase Marker out of Clothing. When my son kept coming home with dry erase marker on his jeans, I had to find a way to save his pants from being ruined and permanently stained by the marker. I finally found a solution.

With two young boys, our laundry is never without a few articles of clothing with mysterious stains. Then Elijah started school, and suddenly one stain became a regular – DRY ERASE MARKER! Since he has lost a couple pairs of pants to this epidemic (and we’re already buying him new pants constantly because he won’t stop growing), I’m on a mission to figure out the best way to remove dry erase marker from clothing.

When Elijah first came home with a black ink stripe on his pants, it didn’t seem like that big of a deal. He’s in kindergarten, he’s very creative and artistic, and he’s kind of careless at times with how he holds his writing utensils. But the black mark didn’t come all the way out when I washed his jeans.

So it wasn’t a washable marker he’d had.

The next time the “tiger stripes” showed up on his jeans, I asked him, “How do you keep getting marker on your pants?”

He said they were from the dry erase marker when he was writing on the whiteboard.

I mentioned the marked-up pants to his teacher, and at first she just thought I was expecting him to be perfectly neat and mature with how he handles the markers.

Hahaha.

No. I live with this child. I’ve cleaned marker off his hands, his arms, his face, and the soles of his feet. While I have begged him to be more careful when he’s handling those markers, I know I’ll still be facing random marks in the future.

When she realized I meant that the stains weren’t coming out, she seemed surprised.

“Doesn’t it just wash out?”

Nope. At least not every time.

After having hit or miss luck with the marker just washing out when I pre-treated them (and having hit or miss luck with actually seeing the marks before the jeans went into the dryer- ugh), I realized that I needed to find a real solution to this issue.

Life in Lape Haven: Tried It Tuesday - How to get Dry Erase Marker out of Clothing. When my son kept coming home with dry erase marker on his jeans, I had to find a way to save his pants from being ruined and permanently stained by the marker. I finally found a solution.

So, I did some investigating. Yep, Pinterest.

I searched “removing dry erase marker from clothing” and found a few articles, but most of them said the same thing – hairspray or rubbing alcohol. So, treating the marker like an ink stain. (I also saw a few that mention Murphy’s Oil Soap, but since I didn’t have any of that, I thought I’d test out the first options.)

I was ready to try my best to conquer this nuisance. I had two pairs of Elijah’s jeans with marker on them that I’d set aside the other day. One had already been treated, washed, and dried but still looked just like it had when Elijah came home in them. The other pair hadn’t been washed, but they had been sitting for a couple of days.  Most advice I’d read said that dealing with the stain as soon as you could was the best guarantee for success.

Therefore, when I picked up Elijah today and saw that he had stained another pair of jeans with dry erase marker, it was the first time I was even slightly happy to see those marks. Now I had a dried-in-stain pair, a set-stain pair, and fresh-stain pair. If I could get the stains out of all three, we’d be doing really well.

While Elijah was at school, I had followed these directions that I’d found online to use hairspray and rubbing alcohol on the first two pairs of pants. For a little bit of extra oomph, I also scrubbed in some hand sanitizer, which works great to clean dry erase boards and as more of a concentrated alcohol gel was easier to work with than liquid rubbing alcohol. Before I put those jeans in the washer, I added some stain-treater (Spray ‘N’ Wash), and then washed the pants with detergent in cold water.

Life in Lape Haven: Tried It Tuesday - How to get Dry Erase Marker out of Clothing. When my son kept coming home with dry erase marker on his jeans, I had to find a way to save his pants from being ruined and permanently stained by the marker. I finally found a solution.

The set-stain pair actually came out clean! Yea!!! Of course, the stains were fewer to begin with, but yea!!! One down easily.

The dried-in stain pair was still stained. So, I went through the whole process again. It only helped a little. 


By the time I had Elijah’s freshly-stained jeans, I applied the hair spray, rubbing alcohol, hand sanitizer, and Spray ‘N’ Wash stain treater to those jeans and the dried-in stain ones (“third time today” is a charm). They both went through the wash.

The newest stains came out almost completely, and the dried-in ones were a little less noticeable, but I wasn’t satisfied.

One more time through the scrubbing and washing, and today’s stained pants were clean! And the dried-in stains were actually showing less. One more time through should do it, I think. (So…5 times through the process when you set the stain in really well with the dryer. I’ll try not to let that happen again.)

So, while it isn’t a perfectly simple solution for getting rid of those pesky dry erase marks on my child’s jeans, at least I know it will work, eventually, and there is hope for Elijah’s pants.

Next up, trying to get silly putty out of the fabric of MY pants pocket. Life with kids, huh?

Have you ever had a stain that you just couldn’t get out? Did you ever find a solution, besides getting rid of the clothes?

My boys have added to my laundry stain know-how:

How to Get Grease Stains (even set-in ones) Out of Clothing

How to Get Grass Stains Out of Clothes


Tried It Tuesday: Homemade Play-dough

Life in Lape Haven: Tried It Tuesday - Homemade Play-dough. This quick, easy, and super soft and squishy playdough recipe is great for a fun indoor activity that you can put together with ingredients already in your kitchen.
Winter has finally decided to make an appearance this week in Ohio. You know, since it’s January and all.

With the weather cooling down to “cold,” yesterday I decided that the boys and I would have some fun on Elijah’s last day of winter break by making the very first thing I ever tried after I discovered Pinterest.

I’m sure you all remember your first Pinterest project. You either created an inspiring masterpiece that gave you the confidence to attempt another awesome Pinterest DIY or copycat recipe soon after, or you tragically face-planted with an epic Pinterest fail that may or may not have been featured on one of those “Nailed It” memes that make the rounds on Facebook.

Thankfully, my first Pinterest-inspired activity was a huge success, not only because it was easy and turned out as expected, but also because Elijah loved it. It’s been one that we’ve come back to often.

Like yesterday.

Hello, again, homemade play-dough (or playdough, however you want to space it). 🙂

Life in Lape Haven: Tried It Tuesday - Homemade Play-dough. This quick, easy, and super soft and squishy playdough recipe is great for a fun indoor activity that you can put together with ingredients already in your kitchen.

Yep. Play-dough cemented my Pinterest love.

Elijah found that play-dough also cements itself when a little boy leaves it out overnight, but thankfully this homemade dough is easy and inexpensive enough to make (all the ingredients are already in your kitchen) that I can just toss it when it gets forgotten and dried out or when someone steps on it on the floor. Because you know some of it WILL end up on the floor.

(Honestly, I have a bit of a love-hate relationship with all makes and brands of play-dough because while it’s fun and we all love it, it can create quite a mess, or rather the children playing with it can. Fortunately, this dough cleans up pretty easily.)

We’ve made several batches with this recipe over the last few years. We’ve even given it away as part of Christmas presents to my nephews one year.

When I told Elijah yesterday that we would be making more, he was so excited that he ran across the room and gave me a giant, dramatic hug.

While I planned to make it in the afternoon, we HAD to do a bit of grocery shopping despite the cold, so we ended up putting our play-dough together right before dinner.

Life in Lape Haven: Tried It Tuesday - Homemade Play-dough. This quick, easy, and super soft and squishy playdough recipe is great for a fun indoor activity that you can put together with ingredients already in your kitchen.

This actually worked out rather well. They each got to help dump in the ingredients and stir up their own batch, and then once the boys each had their dough, they were happily entertained at the kitchen table, leaving me alone to cook dinner.

Perfect.

So, whether you need an easy indoor boredom buster, or just want a few moments of peace, this quick homemade play-dough recipe from How Does She? is a great solution.

For outdoor fun, when it’s not so cold, you can also try one of our other favorites: Homemade Sidewalk Paint.

I really do love Pinterest. You can follow me and keep up with all the fun, helpful, yummy, and/or insightful things I find.


YOU MAY ALSO LIKE:

How to Dye Dry Pasta

My Kids’ New Favorite Board Game

My Favorite FREE App for Kids


Our Four Gift Christmas

Our Four Gift Christmas - Life in Lape Haven. This year our family scaled back to 4 presents per person with the guidelines of something they want, something they need, something to wear, and something to read. Here is how it all worked out and what we think about this new holiday tradition.

A few weeks ago, I wrote about our family’s plan to have a more scaled back Christmas, which meant limiting our gift-giving to a simple four gift checklist:

#1. Something they want

#2. Something they need

#3. Something to wear

#4. Something to read

Well, we tested out this minimalist Christmas thing.

How did it work? Did we stick to our plan? Did our boys miss the excess? Is this new tradition a keeper?

Here are the answers to all those questions, in case your family is feeling the nudge to have a simpler Christmas next year.

Our Four Gift Christmas - Life in Lape Haven. This year our family scaled back to 4 presents per person with the guidelines of something they want, something they need, something to wear, and something to read. Here is how it all worked out and what we think about this new holiday tradition.

HOW DID IT WORK?

It was brilliantly easy, for the most part. Having some guidelines for the gifts made it so simple to know what to buy for our boys and eliminated any impulse buys we faced.

Elijah’s list was the easiest to fill because he only “wanted” one thing, he knew what he wanted to get for his “to wear” item, and the other two slots – need & read – filled themselves.

Josiah’s was trickier because he kept seeing new things on television every day that he “wanted.” He would say, “Can I have that for my birthday?” Elijah, being the older brother, would answer before I had a chance, reminding Josiah that, “It’s not for your birthday. It’s Christmas. And you only get ONE thing.”

However, watching how Josiah has been playing lately, we came up with a “want” that he truly did want, and it wasn’t even something he’d seen on a commercial.

Once we had an item for each spot on their lists, we were done. It was amazingly easy. Hubby couldn’t add “one more thing” for either one, as he likes to do, and we didn’t have to worry about one ending up with more presents to open than the other.

Life in Lape Haven: Tried It Tuesday - Our Four Gift Christmas. This year our family scaled back to 4 presents per person with the guidelines of something they want, something they need, something to wear, and something to read. Here is how it all worked out and what we think about this new holiday tradition.

DID WE STICK TO OUR PLAN?

Yes, for the most part. The only deviations we made were to have more than one item in a couple of Elijah’s packages. For his “to read,” since he is reading now, we got him two books instead of just one, but wrapped them together. We also added a couple of shirts to his “to wear” present because all he asked for was a scarf, but he really needed new shirts (he just won’t stop growing out of things!). Since all three of Elijah’s clothing items combined were less than the price of Josiah’s huge pack of socks for his “to wear,” we felt it was fair enough and still within our budget and guidelines.

They each had four gifts to open from us on Christmas morning.

They also had their Christmas Eve pajamas the night before, their stockings, and a gift from each other. We didn’t include their gifts from each other in our four-gift rule, nor did we plan to in the beginning because when you let a child buy a gift for their sibling or parents, you can’t really plan what they are going to pick out to give! 🙂

After our boys shopped for us, it put Brad & me both over four gifts each, which we hadn’t really thought about ahead of time. Usually when our boys shop, they get one gift for Mommy and one for Daddy. This year they went with Grandma and found some good sales. They ended up way under budget, though, and they had a wonderful time watching us open the presents from them.

Life in Lape Haven: Tried It Tuesday - Our Four Gift Christmas. This year our family scaled back to 4 presents per person with the guidelines of something they want, something they need, something to wear, and something to read. Here is how it all worked out and what we think about this new holiday tradition.

DID OUR BOYS MISS THE EXCESS?

Honestly, I think they were freer and happier without the extras. They haven’t seemed to miss anything.

While we’ve never been ones to go crazy with presents, this year the boys did have fewer presents to open. However, they truly seemed to enjoy the morning even more. Since they knew what the guidelines were, they knew what to expect, and I think that helped them. They weren’t in a rush to go from one gift to the next, and when we were all done, they were content. I really didn’t see any disappointment.

They have enjoyed the presents they received, from us and from family members, but they haven’t seemed as overwhelmed as they have been in the past. Having fewer new toys means that they are appreciating each one more and really playing with them.

Life in Lape Haven: Tried It Tuesday - Our Four Gift Christmas

IS THIS NEW TRADITION A KEEPER?

ABSOLUTELY, YES!!! It’s amazing what a difference it made all around to our holiday. There was no stress – like, zero! – in shopping for our boys. It felt so laid-back and easy. Since we purchased fewer items, we probably put more thought into our choices, but there wasn’t any pressure that an item had to be the perfect gift. There seemed to be greater appreciation for each item, too.

I’m sure we saved money, so that’s always helpful.

And wrapping! I can wrap four presents in no time! That was so nice. It takes Brad a little longer to wrap things, but even then, we had them sorted and done quickly. Everything was organized, simple, and peaceful.

Instead of shopping and wrapping and stressing, we were enjoying hot chocolate and old movies with our boys, reading the Christmas story again and again, and making cookies to share with our neighbors and memories to share forever.

I think it was probably one of the best Christmases we’ve had in a long time.


DID YOU START ANY NEW TRADITIONS THIS YEAR? DO YOU HAVE ANY GUIDELINES THAT YOU FOLLOW FOR GIFT GIVING AT CHRISTMAS?


Get more ideas & encouragement from this real-life mom as I experience God’s faithfulness through the joy and chaos of motherhood.

Join my email list!  

YOU MAY ALSO LIKE:

Why We Don’t Need MORE This Christmas

10 Ways to Help Your Kids Make Christmas More About Others

Inexpensive Crafts That Make Great Christmas Gifts for Grandparents

Nobody is Grading Your Holiday