Life in Lape Haven

Tag - Tried It Tuesday

Tried It Tuesday: Easy, Chewy Peanut Butter Cookies

Life In Lape Haven - Tried It Tuesday: Easy, Chewy Peanut Butter Cookies. A simple and simply delicious peanut butter cookie recipe for crunchy, yet chewy cookies.

I have a pretty great husband. I do. Not only is he a Godly man who loves me and the boys and works diligently to take care of us, he is my number one fan in everything I do. He helps cover my slack around the house when I’m working on projects, even cleaning the bathroom, and he stays up with me on those late nights when my blogging inspiration is a little delayed, so that he can proofread for me and just be with me.  (It’s okay to say, “Awww.” He’s totally a sweetheart.)

So the other day when I was itching to bake something sweet, I thought of him and his recent comment about craving some good peanut butter cookies.

I don’t think I’ve made peanut butter cookies since we’ve been married, so I had to do some online searching to find a recipe that sounded like a winner.

After reading through a couple of recipes and their comments, I decided on this one, Thick and Chewy Peanut Butter Cookies from Dessert Now Dinner Later, mainly because I know Brad likes chewy cookies, and she also mentioned that you can just scoop and bake these cookies rather than rolling them and pressing them with a fork.

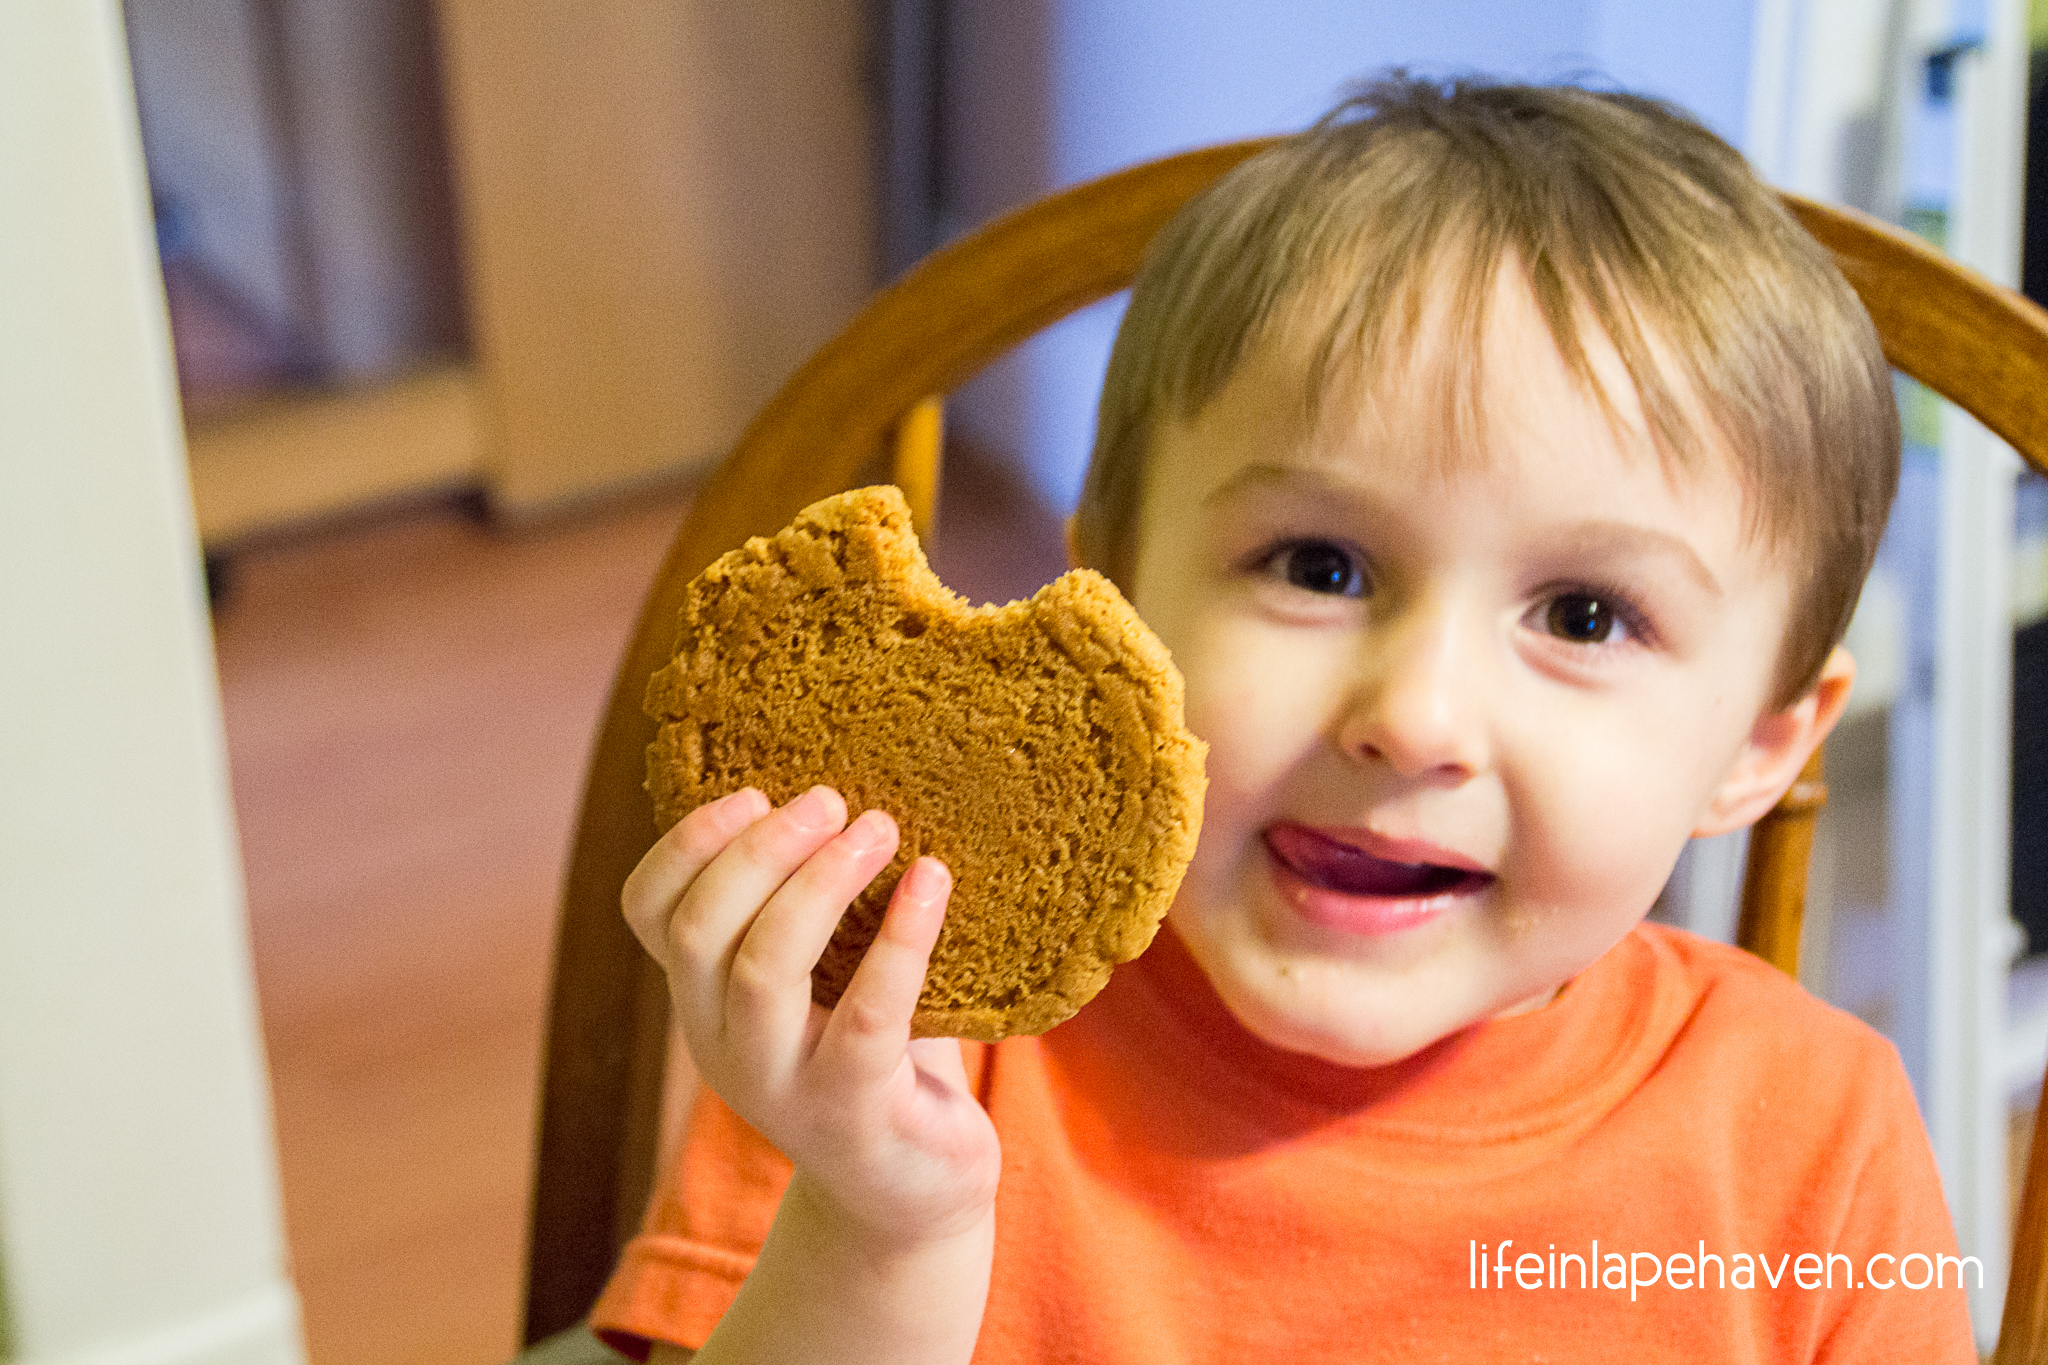
Josiah was on-hand to be my assistant, which usually means it takes me way longer to make something than it would if I were doing it all myself, but I know that he gets such joy in being my “big helper boy,” that it’s worth the extra time, mess, and occasional frustrations that come with little ones helping in the kitchen.

Life In Lape Haven - Tried It Tuesday: Easy, Chewy Peanut Butter Cookies. A simple and simply delicious peanut butter cookie recipe for crunchy, yet chewy cookies.

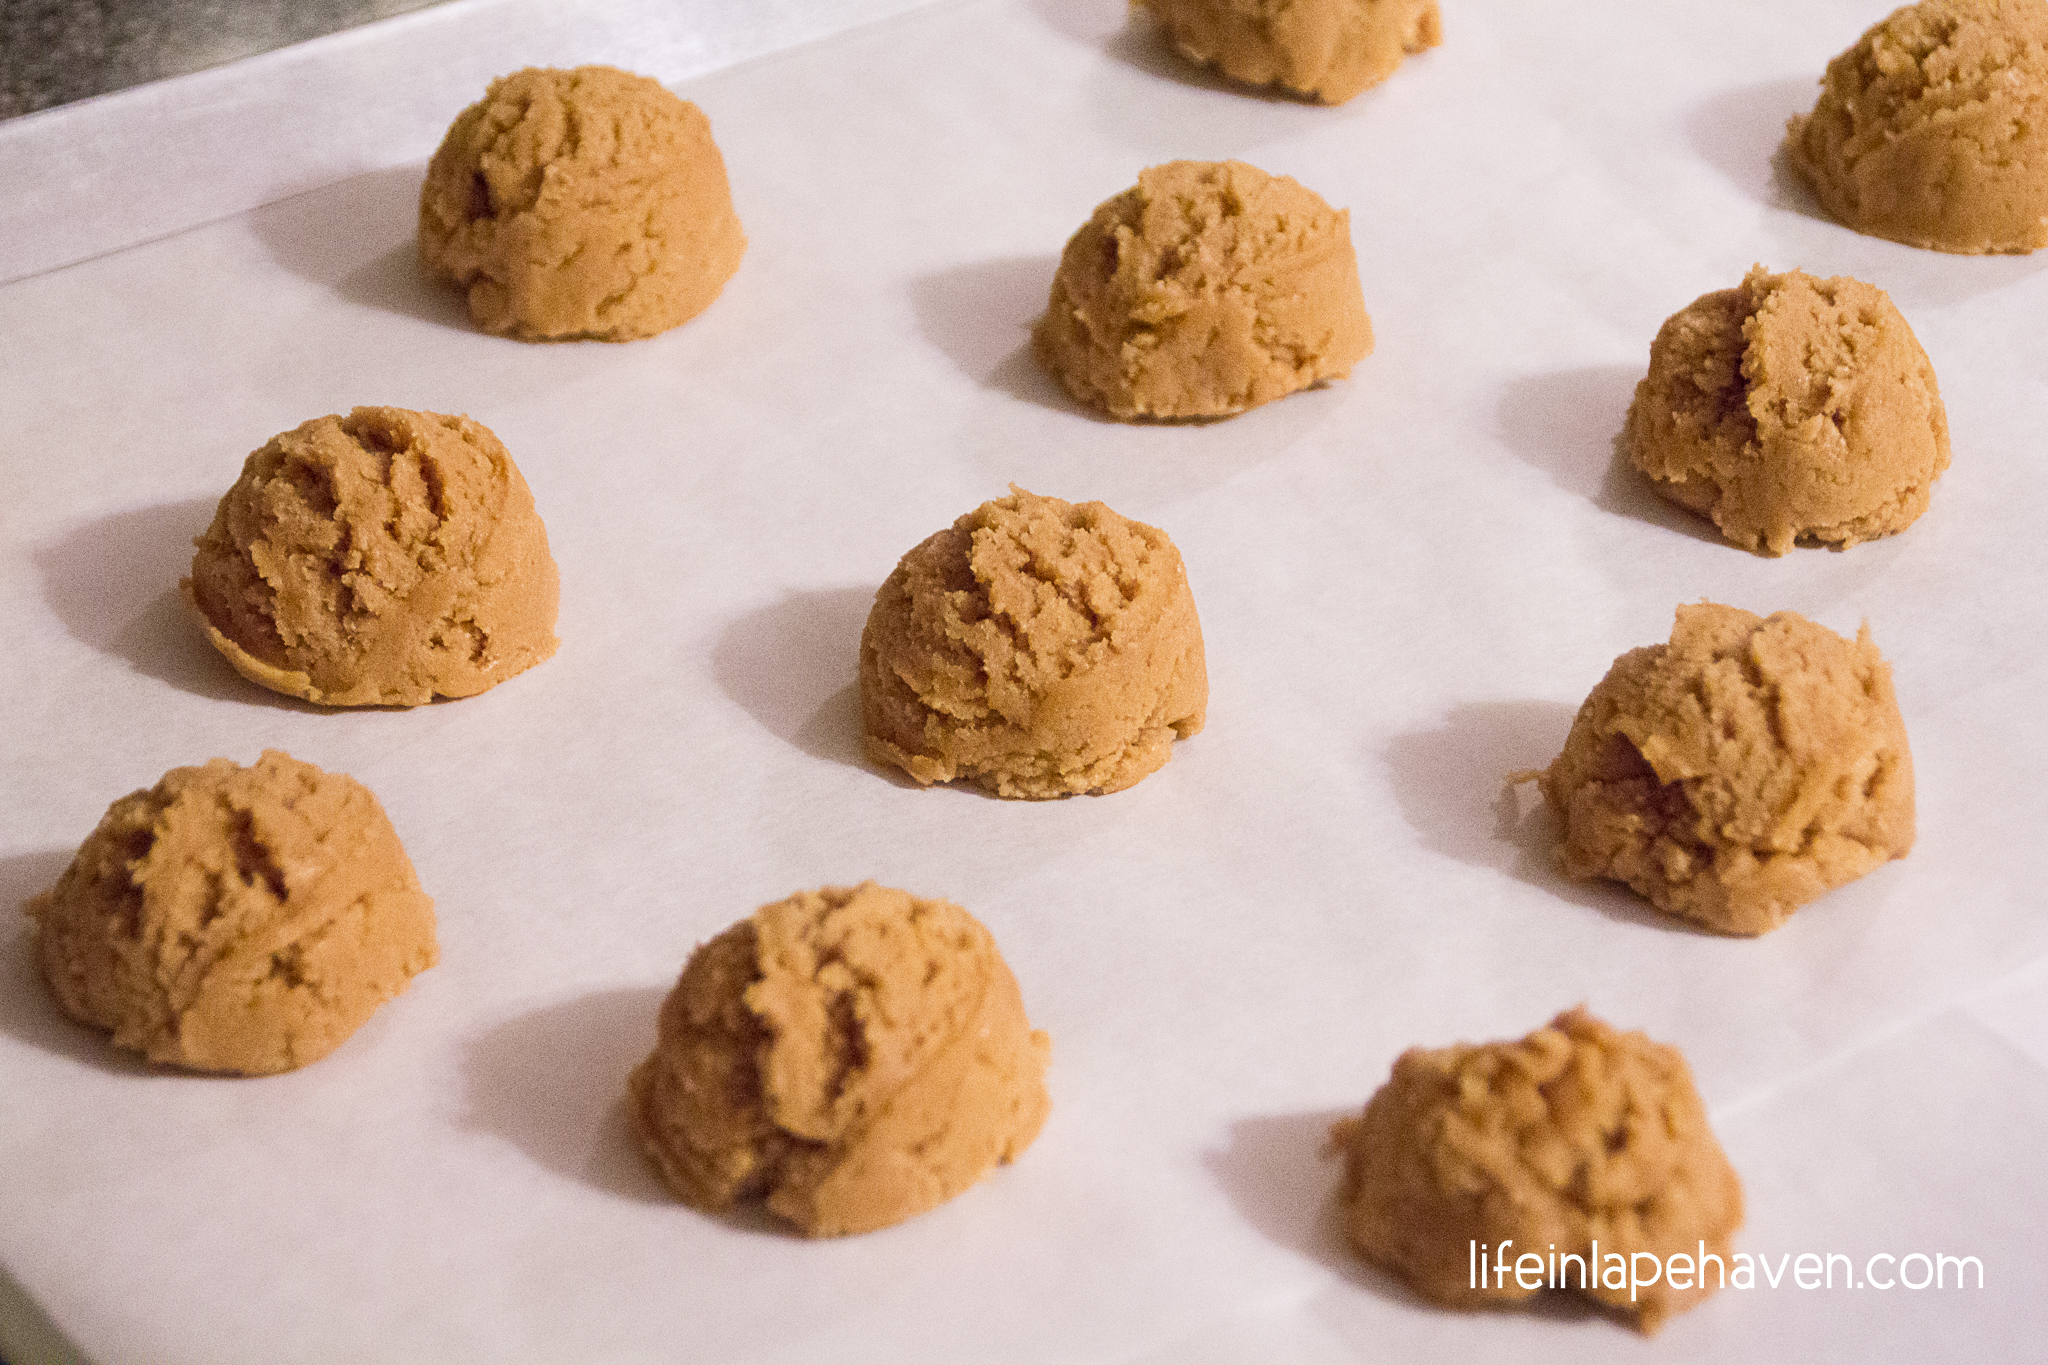
These cookies are super easy. It’s just a matter of creaming your butter and sugars, mixing in your peanut butter, egg, and vanilla, and then adding your dry ingredients. From there, you scoop your cookie dough out onto the baking sheet, bake, and enjoy.

The first time I made these, I let them bake a little too long. The scooper I used was larger (#20) than the one the author used for hers (#30), so I adjusted the time…but a bit too much. On the plus side, the cookies were huge! 🙂


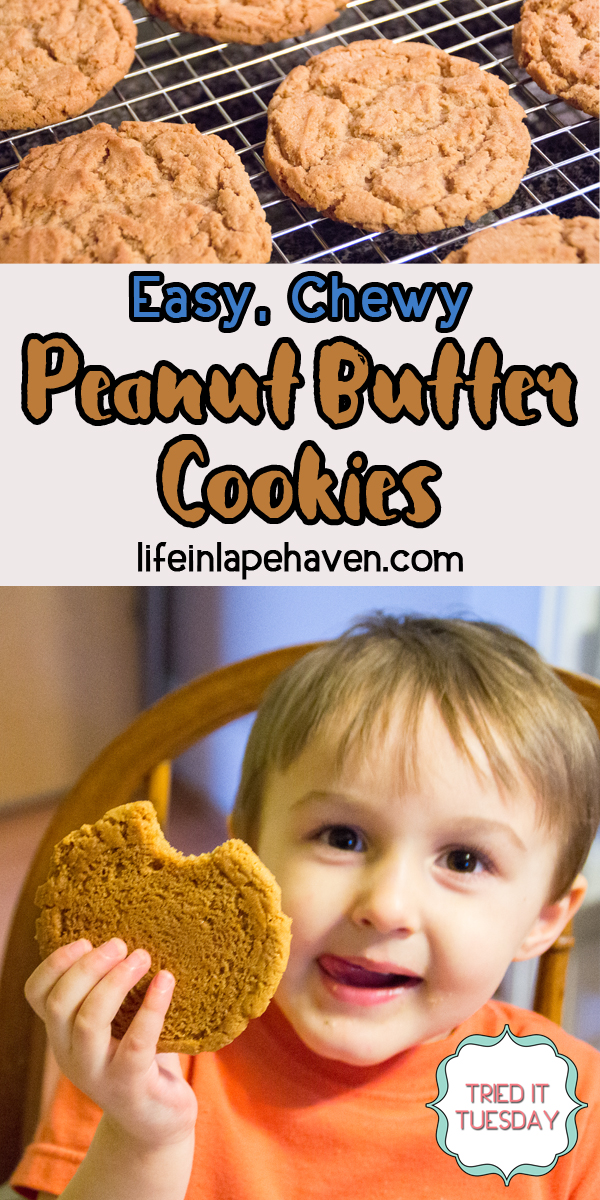
However, the cookies were still really good. Brad was pleasantly surprised to come home to homemade peanut butter cookies, and the boys loved them, too.

Life In Lape Haven - Tried It Tuesday: Easy, Chewy Peanut Butter Cookies. A simple and simply delicious peanut butter cookie recipe for crunchy, yet chewy cookies.

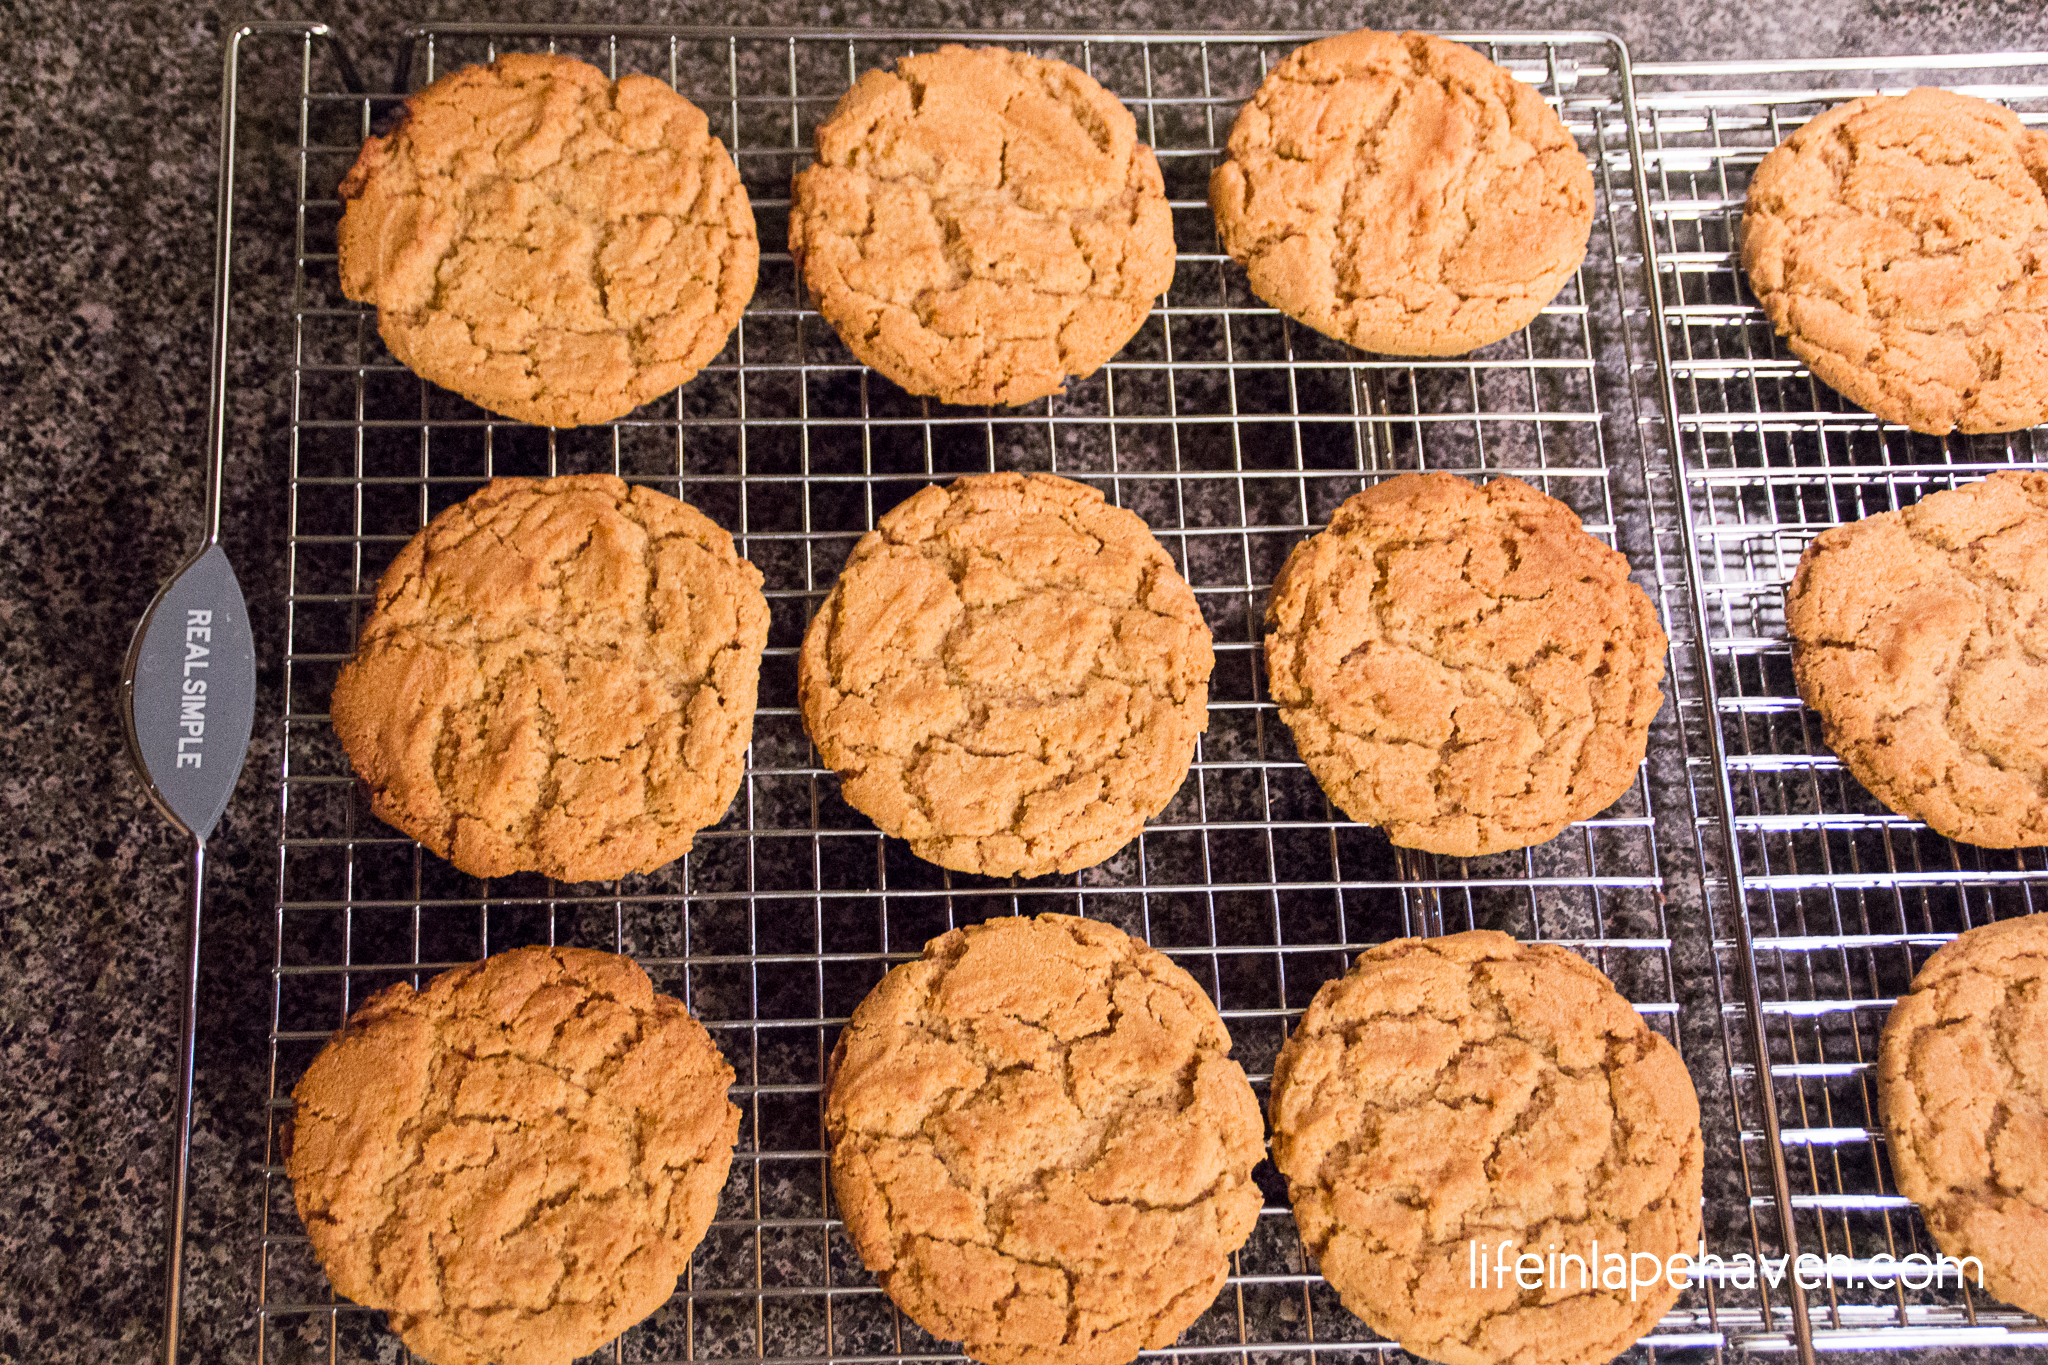
Since I knew the cookies could have been better, I had to do a second batch a few days later with the intent of getting the right cooking time. No one in my house complained about more cookies. This time I pulled them a couple minutes sooner, and they were even better than the first ones.

So now I have a tasty, easy go-to recipe for peanut butter cookies on the days that I want to do something a little special for my hard-working, giving hubby. (Awww – yes, I’m a sweetheart, too. Hahaha)


By the way, even though I haven’t tried it – yet – I’m pretty sure you could create a variation on this cookie by subbing out the peanut butter for hazelnut spread. Mmmm. I considered doing that, but Brad is not a fan of hazelnut spread. Or you could mix in some chocolate chips with the peanut butter cookies because chocolate + peanut butter = yumminess. I have also seen people put marshmallow creme and melted chocolate between two peanut butter cookies to make a fun cookie sandwich.

Life In Lape Haven - Tried It Tuesday: Easy, Chewy Peanut Butter Cookies. A simple and simply delicious peanut butter cookie recipe for crunchy, yet chewy cookies.


Okay, now that you’re hungry for delicious, chewy peanut butter cookies, here’s the recipe. Enjoy!!!
A simple, and simply delicious, chewy peanut butter cookie recipe.
YOU MAY ALSO LIKE:

Bacon Chocolate Chip Cookies

Old Fashioned Pumpkin Cookies

Homemade Vanilla Ice Cream

Homemade Chocolate Syrup


Tried It Tuesday: My Kids’ New Favorite Board Game

Life in Lape Haven - Tried It Tuesday: My Kids' New Favorite Board Game. With all the gifts my son received for his birthday, I didn't expect this simple, but cute, board game to be his new favorite game to play. Our whole family enjoys this award-winning game.

This post contains an affiliate link, which means at no additional cost to you, I may receive a small commission when you make a purchase through the link.

With Josiah’s recent birthday, he has had an influx of new toys, clothes, and games to enjoy.

Of all the things he received for his birthday, there is one thing that both he and Elijah have been playing with more than any other: The Sneaky Snacky Squirrel Game.

I could claim all kinds of “awesome parent” points for this since it was from Mommy & Daddy, and I picked out the game… except that with Easter and birthday party prep, I kind of overlooked getting him a present until a couple days before his birthday.  (Brad and I have been considering getting the boys a swing set or playset for our yard, but we hadn’t found one yet, so we kept putting off getting Josiah’s birthday gifts, just in case we came across a swing set before his birthday.)

Thankfully, my instincts were good on this one. I knew I had seen comments about how much families liked this award-winning game, so I figured it would be worth a try. Besides, we (read: Mommy) can only play so many games of Candyland.

Life in Lape Haven - Tried It Tuesday: My Kids' New Favorite Board Game. With all the gifts my son received for his birthday, I didn't expect this simple, but cute, board game to be his new favorite game to play. Our whole family enjoys this award-winning game.

The boys even played this game in their blanket fort.

From the minute we opened the box, the boys were intrigued (and fighting over the adorable “squirrel squeezer”). With their little tree trunks in front of them, they barely let me read over the very easy directions before they started trying to play.

It’s a really simple game with a spinner, acorns in five different colors, tree trunks for “stashing” your acorns, and the aforementioned cute little squirrel squeezer that you use to pick up the acorns. The object of the game is to collect all 5 colors of acorns before anyone else, but you have to watch out for obstacles on the spinner that slow you down: the Sad Squirrel that causes you to lose your turn and the wind storm that blows all your acorns back to the main tree.

Life in Lape Haven - Tried It Tuesday: My Kids' New Favorite Board Game. With all the gifts my son received for his birthday, I didn't expect this simple, but cute, board game to be his new favorite game to play. Our whole family enjoys this award-winning game.

Without a doubt, our boys’ favorite thing to land on is the Sneaky Squirrel because then they get to steal an acorn from someone else. They are positively delighted to get to be so mischievous. Of course, they don’t really enjoy it when someone else steals their acorn, so it’s been a great game for teaching them to be a good sport.

Life in Lape Haven - Tried It Tuesday: My Kids' New Favorite Board Game. With all the gifts my son received for his birthday, I didn't expect this simple, but cute, board game to be his new favorite game to play. Our whole family enjoys this award-winning game.

That first day we played several rounds of the game, and we’ve played it nearly every day since. They played it with their grandparents, and Josiah even took it over to his cousins’ house this past week to introduce them to the fun. Watching the four boys play it together was hilarious and precious. They all loved the sense of accomplishment when they managed to collect all their acorns and win a game.

As a parent, I appreciate the simplicity of the game, which makes it easy for my 3-year-old to play without help, while not being too young for my 5-year-old (or  Brad and I) to have fun. The game is designed to help encourage color identification, as well as matching, sorting, strategic thinking, hand-eye coordination, fine motor skills and pre-handwriting skills, and I can already see improvement for Josiah in some of those areas.

So even if it was more of a last-minute gift, it has turned out to be a great one, one that our entire family enjoys playing, and one that has easily become our boys’ new favorite board game.


Tried It Tuesday: How to Get Grease Stains (Even Set-In Ones) Out of Clothing

Life in Lape Haven - Tried It Tuesday: How to Get Grease Stains (Even Set-In Ones) Out of Clothing - After finding grease and oil spots on my son's shirts, ones that had already been washed and dried, I decided to find a simple way to get the grease and oil stains out of his clothing.

My children are really doing wonders for improving my laundry skills and stain-treating know-how lately. First it was the hunt to figure out how to get rid of dry erase marker on my 5-year-old’s pants. Then, thanks to my 2-year-old, I learned how easy it is to remove silly putty from fabric.

This week, Elijah’s sloppy eating habits have sent me on a new quest: How to get grease stains – set-in ones, too – out of clothing.

(This post may contain affiliate links, which means that at no additional cost to you, I may receive a small commission when you use the link.)

Last week my son wore a brand-new yellow polo shirt to church and at lunch spilled pasta sauce on it. My hubby used cold water to sponge it off, and I thought we might have dodged a stain bullet. I even pretreated it before washing it, just to be safe. However, I was disappointed when I went to fold the laundry and saw three very obvious oily, grease splotches on Elijah’s only-worn-once new shirt. Ugh.

Then that night as I was pulling clothes out of his dresser for him to wear to school in the morning, I picked out a long-sleeved dark blue shirt, only to toss it back down in defeat when I noticed that it had some mysterious greasy-looking stains on it, too.

Determined to salvage these two shirts, I looked for solutions online for how to remove grease or oil stains from clothing. Having tried the chalk idea in the past with little success, I skipped that, and we didn’t have any WD-40 on hand, so that knocked out a good number of Pinterest search results for removing grease spots.

Then I found one that promised that I could get the grease out, even if the item had been through the dryer, using only items that I had in my house!

It required Spray ‘N’ Wash stain treater, baking soda, dish detergent, and an old toothbrush. Check, check, check, and check!

I was ready to treat, scrub, and wash, and hopefully save two shirts.

Following the directions I had found, I treated the shirts with Spray ‘N’ Wash and used the toothbrush to scrub it in. Then I heavily dusted the treated areas with baking soda and scrub some more. (Actually, Josiah came in and wanted to help, so I let him do some scrubbing). After that I added some dish detergent, scrubbed a final time, and then let the shirts set about 10-20 minutes.  (The instructions online said you could leave it anywhere from 5 to 30 minutes.)

After washing and drying the shirts as usual, I laid them out on the table for inspection.

Sadly, the yellow shirt still had some visible staining, even though it was much less than before. The blue shirt actually looked completely stain-free, however, which made me very happy. It wasn’t until I took a picture of the blue shirt, using my flash, that I could even see even a hint of a small stain or two that I must have missed treating the first time through.

Having evidence that the solution would help, I put the yellow shirt through a second complete stain treating and scrubbing, then washed and dried it again.

This time, the stains were pretty much gone. Again, it only shows up vaguely when I took a picture with my flash on. To the naked eye, it looks like a stain-free shirt again!

Tried It Tuesday: How to Get Grease Stains (Even Set-In Ones) Out of Clothing - After finding grease and oil spots on my son's shirts, ones that had already been washed and dried, I decided to find a simple way to get the grease and oil stains out of his clothing.

So, now I know that Spray ‘N’ Wash, baking soda, and dish detergent are a great combination for getting grease and oil stains out of our clothing.

I wonder what new stain my little boys will find for me to become an expert on next…

Here’s a hint: It’s grass stains! 🙂

How to Easily Create Beautiful Chalkboard Lettering {+ FREE PRINTABLES}

Life in Lape Haven: Tried It Tuesday - How to Easily Create Chalkboard Lettering. With a print out, chalk, and a chalk marker, I used an easy technique to made my own custom chalkboard with beautiful lettering, plus I'm sharing my design with you in a FREE printable with three variations.

Almost two years ago, I wrote out my “Mommy Motto” verse on a little chalkboard in my kitchen, doing my best to use my prettiest “scripty” print on it. While my handwriting isn’t horrible, neither is it truly decorative, and every time I saw my little chalkboard, I would think “One of these days I’m going to do that verse over in prettier lettering.”

Of course, rewriting the verse on my kitchen chalkboard was WAAAAYYY down on the bottom of the to-do list. It was really on more of the “it-would-be-nice-if-I-ever-get-a-chance-to-do-it” wish list. So many beautiful, wonderful ideas live on that list. All I have to do it wait for the time and/or the money to do them. You have one of those lists, too, right? (If you have a Pinterest account, I bet you do!)

Then one day I saw a graphic on Pinterest that showed how you could easily transfer your design to a chalkboard, and I discovered these things called “chalk markers.” It was like chalk, only also like a marker, and it would last longer because it didn’t smudge.

I was so excited.

Finally, close to Christmas this year, I remembered to look for a chalk marker during one of my visits to Hobby Lobby. When I found them, I got one to put in my Christmas stocking. 🙂  (I figured I didn’t know how well it would work or how often I’d use it, so I picked a simple white marker.)

Once I had my marker, I just needed the time to create my design and redo my chalkboard.

This past week, I finally did it. (Again, there are so many things on the daily Wife-Mommy-Blogger to-do list that those little “just for fun” projects often get set aside.) But my hubby had the day off, the house was relatively presentable, both boys were healthy and happy, and suddenly I had TIME!!!

So, here’s how I did it:


DESIGN IT

Having made lots of graphics for my blog, I knew which fonts I really liked, so designing the lettering was fairly easy. I used Photoshop, but you could easily use the free services on PicMonkey or Canva.  I measured my chalkboard so I knew what size I needed to work inside of with my layout. (Mine was 7×11). You could also just search online for any traceable design or image you’d like to have on a chalkboard and use that, too.

Life in Lape Haven: Tried It Tuesday - How to Easily Create Chalkboard Lettering. With a print out, chalk, and a chalk marker, I used an easy technique to made my own custom chalkboard with beautiful lettering, plus I'm sharing my design with you in a FREE printable with three variations.


PRINT IT

Once I had my design the way I wanted it, I printed it out in black and white. I added a faint gray border around the outside of the design so that I could easily cut it out of the 8-1/2 x 11 letter-sized paper.


CHALK IT

Here’s where you start the magic! I turned the paper print-side down and used a piece of white chalk to color all over the back of the design area. (You could also graphite instead of chalk on the back if you happen to have it, but if you have a chalkboard, you most likely have chalk handy.)


TAPE IT

After the back was nice and chalky, I flipped the paper over and taped it, gently, print-size up, on the clean chalkboard.


TRACE IT

Using a sharpened pencil, I traced over each letter and design carefully, making sure to apply enough pressure that the chalk on the back would transfer onto the chalkboard underneath.


WRITE IT

Time to use that chalk marker! I carefully removed the paper from the chalkboard, taking off the tape from one side and gently lifting the paper away. I wanted to make sure that the complete design had transferred enough for me to go over it confidently with the chalk marker before I moved the design too much. Then I began tracing over the faint chalk lines that had transferred. I traced everything from left to right, in columns almost, to avoid smudging the chalk transfer.  Take your time on this step. I found that having just traced the letters in the previous step (with pencil over the print-out) made it easier to remember how the letters were made. 🙂

CLEAN IT UP

I had a couple of places where my marker tip was just a bit too broad for the delicate lettering that I used (next time I’ll make sure to consider that ahead of time!), so I had to go back after I finished writing it all out, and do a bit of straightening of a “t” or opening up the “b” a bit more. I used a tiny piece of slightly dampened papered towel twisted onto the end of a bamboo skewer, so I could get the fine details worked out.

Life in Lape Haven: Tried It Tuesday - How to Easily Create Chalkboard Lettering. With a print out, chalk, and a chalk marker, I used an easy technique to made my own custom chalkboard with beautiful lettering, plus I'm sharing my design with you in a FREE printable with three variations.


ENJOY IT!

I was so pleased with how easily it all came together and how well it turned out for my first attempt. I immediately began thinking of what else I could do with this technique. I do have a small bottle of chalkboard paint on our craft shelf… 🙂 Also, chalk markers come in several different colors. (Beware, though – some chalk markers are PERMANENT on chalkboard and chalkboard paint. Others are not. Make sure you test it first.)

Oh, the possibilities!


{FREE PRINTABLES}

Since I had so much fun doing this project, I wanted to share a little bit of it with you, so I’m giving you a few variations of my design as FREE PRINTABLES! You can print one or all three versions, if you’d like.  Just click on the picture of the version you’d like to download, and then select either the “print” icon or the “download” icon at the top of the full-size picture.

Life in Lape Haven: Tried It Tuesday - How to Easily Create Chalkboard Lettering. With a print out, chalk, and a chalk marker, I used an easy technique to made my own custom chalkboard with beautiful lettering, plus I'm sharing my design with you in a FREE printable with three variations.Life in Lape Haven: Tried It Tuesday - How to Easily Create Chalkboard Lettering. With a print out, chalk, and a chalk marker, I used an easy technique to made my own custom chalkboard with beautiful lettering, plus I'm sharing my design with you in a FREE printable with three variations.Life in Lape Haven: Tried It Tuesday - How to Easily Create Chalkboard Lettering. With a print out, chalk, and a chalk marker, I used an easy technique to made my own custom chalkboard with beautiful lettering, plus I'm sharing my design with you in a FREE printable with three variations.


That’s it! You can use it to make your own custom chalkboard or simply frame it and hang it for a pretty reminder to be joyful, patient, and faithful!


WHAT OTHER VERSE OR QUOTE WOULD YOU LIKE TO DO IN CHALKBOARD LETTERING?

(If you try out this technique, please feel free to share you creations in the comments below! I’d love to see them.)


My Kids’ New Favorite Fun App

Life in Lape Haven: My Kids' New Favorite Fun App. While we limit our boys' screen time, we do like it when we find good, educational children's apps that they love to play. There are some they enjoy a lot and a new one that is their favorite.

(Shhh! It’s Educational!)

By the way, this post contains affiliate links, which means that at no additional cost to you, I may receive a small commission when you make a purchase through the links.

This Christmas my hubby really, really wanted to get our boys a tablet so they could play their ABCMouse.com and other learning apps and games without risking Daddy’s Surface or draining Mommy’s phone. When he found a good deal on a Kindle Fire, I acquiesced, even though I didn’t think my boys’ needed access to yet another screen.

However, with parental controls for when they can play, what they can play, and how long they can play, the tablet has actually been a very good tool for our boys. (Yes, Brad was right.) My favorite parental control setting is the one that requires the boys to spend at least a certain amount of time playing the educational apps before they can even see the icons for the “fun only” games.

This meant, though, that we needed to find some really good educational app options for them. We definitely included ABCMouse, but we wanted them to have more to choose from. I also preferred they be inexpensive, or better yet, FREE. Some of the good ones we found are totally free, while others are free but have more with the paid upgrade, and still others are, at most, a few dollars.

Since the boys each have their own profile, we can customize who gets what apps, so Josiah’s educational apps are the counting, colors, shapes, and ABC ones. Ones that he seems to really enjoy are Toddler Counting 123, Phonics Island by 2 2Learn (we upgraded from the free), and Monkey Preschool Fix It! (I really like that one)

For Elijah, some of the apps we included were Phonics Island (even though he’s reading well), Sight Words & Flash Cards Volume 1 by 2 2Learn (also upgraded), and Monkey Word School Adventure, plus some free Kindle books that he can read.

They have been doing well with using their learning apps, and I can definitely tell that the boys are learning, especially Josiah, who has been counting things and trying to identify letter sounds.

Life in Lape Haven: My Kids' New Favorite Fun App. While we limit our boys' screen time, we do like it when we find good, educational children's apps that they love to play. There are some they enjoy a lot and a new one that is their favorite.

However, the other day, Elijah asked if we could find him a new game or app for the tablet and offered to pay for it with his own money from his piggy bank.

We did a quick search on Amazon for apps for kids, and I sorted the results by the highest customer rating. That’s how we found ThinkRolls 2. This app had a 5-star rating from 97-percent of the reviewers, with the remaining 3-percent giving it 4 stars.

If you’ve never heard of the app (we hadn’t), here is some of the game description:

“Thinkrolls 2 is an enlightening logic puzzler for kids 3-9…Children must use all their wits to navigate 28 spunky characters through 235 levels of increasingly complex mazes (117 for ages 3-5 and 118 for ages 5-9)… This clever game of logic keeps kids on their toes as they use properties of matter and basic physics to make their Thinkrolls not only roll, but float, glide, and teleport through a series of themed chapters. Each gradually introduces a new scientific concept in an accessible, easy to understand way. As kids explore and master, through trial and error, how to navigate the twists, turns and many pitfalls, they gain confidence in their deductive reasoning and ability to problem solve.”

It intrigued me, so I looked for reviews outside of Amazon and found this YouTube video, which shows you how the app is played.

Elijah watched along with me, and just a little way into it, he was saying, “Yes, I want that one.”

Not only does Elijah LOVE it, but so does Josiah, and I have been very surprised and impressed to watch them figure out how to move their character through the maze and the obstacles. They are learning how to think through steps to solve a problem, and when they make a mistake, the character doesn’t die. They just hit the do-over button at the top corner, and they can try again. Plus, the game lets them keep trying and trying until they get it. It isn’t timed, there’s no limit on do-overs, and no help prompts, unless you, as the parent, give them a nudge.

Life in Lape Haven: My Kids' New Favorite Fun App. While we limit our boys' screen time, we do like it when we find good, educational children's apps that they love to play. There are some they enjoy a lot and a new one that is their favorite.

Each time they finish a level, they unlock a new little character, which Elijah said is his favorite part. Once he completes the “easy” levels, we can bump him up to the harder levels and see how he does, so the game can kind of grow with them. You can also have up to 6 player profiles on the game with different difficulty settings, so you can have your preschooler and elementary kids playing at their own levels. The game automatically starts wherever you leave off.

By the way, this game isn’t only for kids. When I had Brad play it the other night, I later had to suggest that he quit playing and get ready for bed. Haha. It IS really fun.

It is a purchased app, but the few dollars have already been more than worth it for my boys…all three of them. 🙂

More Daniel Fast Recipes

Life in Lape Haven: Tried It Tuesday - More Daniel Fast Recipes. Hubby and I are in our second week of participating in a 21-day Daniel fast with our church, and I'm finding lots of new recipes to try as we follow the guidelines of this partial fast, which includes only vegetables, fruits, whole grains, beans, nuts, seeds, and water. These two recipes are our favorites from this week.

Last Tuesday, I told you all about how Brad and I are participating in a 21-day Daniel fast with our church for most of February.

As we head into our third week of this partial fast, I’m so thankful for the internet and all the Daniel fast recipe ideas out there for us to try. Since I’m not used to cooking with just vegetables and vegan ingredients, we would have exhausted my meal ideas within the first few days for sure!

This past week, we’ve found a couple more tasty recipes to add to our Daniel Fast meal planning.

First up is an unleavened flatbread that was fairly easy to make and surprisingly tasty despite its simple ingredients. Elijah and Josiah “helped” me make this Lavash Bread by fighting over who got to roll out the pieces with me.

However, I think their favorite part (and maybe mine, too) watching each flatbread bubble up once we placed them on the hot pizza stone in a very hot oven.

For the recipe, I used about 3-1/8 cup of unrefined whole wheat pastry flour instead of white bread flour and 3/4 cup warm water, along with the oil and salt. We didn’t top it with any seeds. 🙂  Mine didn’t puff as big as the pictures online, but we’re okay with that.

As soon as these cooled enough, the boys devoured two of the eight pieces, slathering them with hummus. In fact, I had to hide some of it so our two little guys, who aren’t doing the fast, of course, wouldn’t eat all our “special” bread.


The other recipe that was a HUGE hit this week was the meal I made last night for dinner.

I had seen several recipes for “mock” shepherd’s pie, and I was curious to make one of them. I picked this “Cottage Pie” recipe that uses lentils and mushrooms for the “meat” part of the dish.

Knowing how much Brad loves mashed potatoes, I was pretty certain he would enjoy the meal if only for the potatoes. However, he really, really liked it all and was surprised at how good it was.

What I didn’t anticipate was how much my two little picky eaters would gobble down! It was kind of a gamble for me to make only our Daniel fast food and not prepare something familiar for the boys to eat, but I’m glad I did. Our boys loved it, too! Josiah has been especially fickle with food lately, so I was really surprised when he and Elijah both had second helpings, and Elijah said he wanted “to eat this every day.”

I did adapt my recipe a good bit from the original one in the link, based on what we had on hand.  Here is MY ingredient list:

For the mashed potato topping

8 medium to large potatoes (I baked mine in the oven then scooped out the insides, using my mashed potato shortcut)

2 Tbsp. Coconut Spread (butter substitute)

¼ cup Coconut Milk (You can use more or less depending on your preference)

¼ cup Vegetable Stock (again, however much you need)

¼ tsp Nutmeg (Never used it in potatoes before, but it was good)

Salt to taste


For the filling

1 cup Lentils, prepared according to the package instructions (I did drain away the excess water once they were cooked)

1 Bay Leaf

1 tsp Sea Salt

8 oz. Cremini (Baby Bella) mushrooms, cleaned and sliced

4 oz. Button mushrooms, cleaned and sliced

2-1/2 cup Vegetable Stock

2 Tbsp. Cornstarch

1 Tbsp. Olive Oil

1 medium Onion, chopped

½ tsp chopped Garlic (about 1 clove)

1 Carrot, diced small (about ½ cup)

1 Celery Stalk, diced small (about ½ cup)

½ tsp dried Thyme (I ran out, or I might have used more)

¼ tsp dried Rosemary


I followed the basic directions of the recipe – prepping mashed potatoes, cooking the lentils, then sautéing the veggies (I put the garlic in the filling but not in the potatoes), and then mixing the lentils, veggies, and vegetable stock to make the thickened filling. Then I topped the filling with the potatoes and baked it about 30 minutes at 375.

While this is a really yummy dish, it did take a while to prep (lots of veggies to slice and dice), and it required several pots and pans, even though it all ends up in one eventually.

However, with as well as my boys ate it and as delicious as it turned out, I might be persuaded to make this one again sometime even after the fast is over.